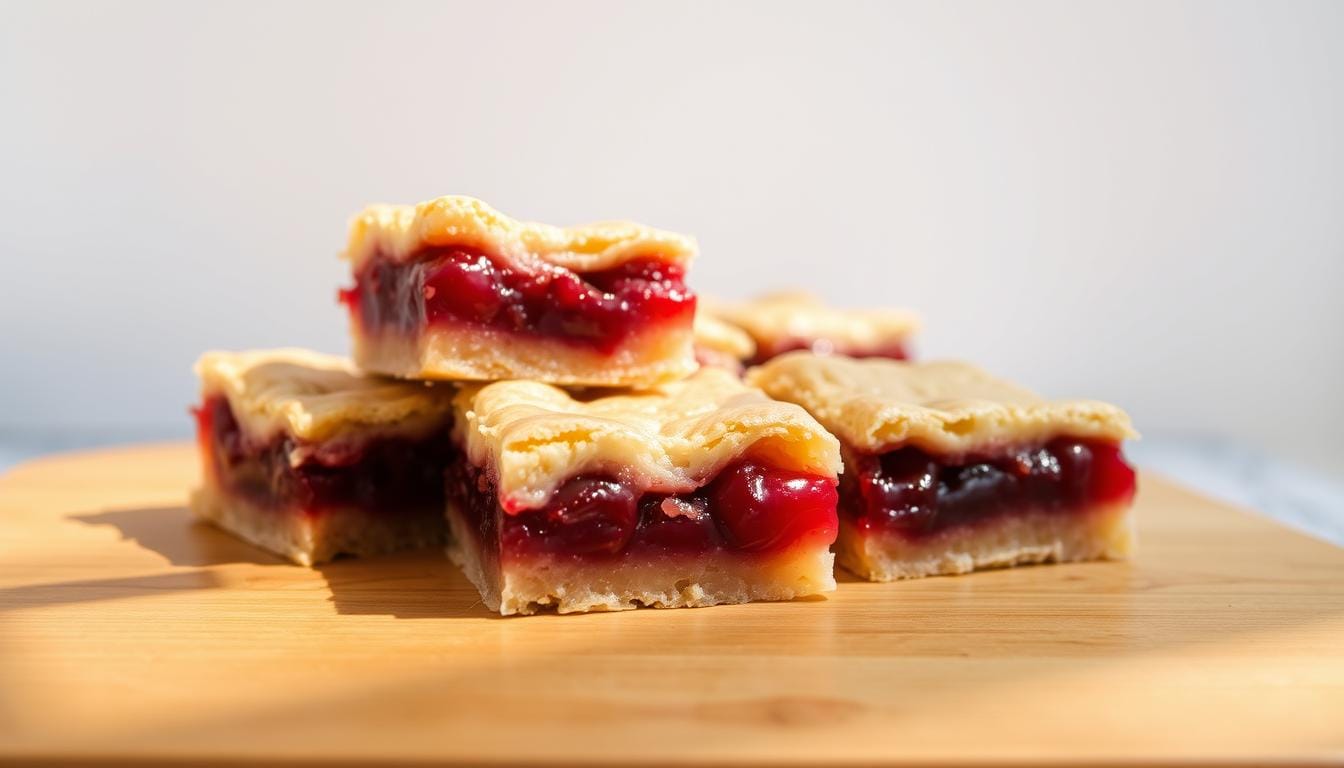
The smell of fresh cherry pie bars reminds us of summer picnics and family gatherings. When you take a bite, the sweet-tart cherry filling explodes with flavor. It takes you back to a simpler time. These easy cherry pie bars are more than dessert; they’re a piece of nostalgia to share with loved ones.
Cherry pie bars recipes are a hit in many homes. They bring the taste of a traditional cherry pie but in a handy, portable form. Whether you’re an experienced baker or new to the kitchen, these bars will wow you with their layers of taste and texture.
What makes cherry pie bars special is their flexibility. They’re great for potlucks, bake sales, or as a special treat for your family. With just 10 minutes of prep and 35 minutes of baking, you can make 12 servings quickly. Each serving is 522 calories of pure indulgence.
Table of Contents
Cherry Pie Bars: A Perfect Blend of Sweet and Tart
Cherry pie bars are a fun twist on the classic dessert. They mix the rich taste of cherry pie with the ease of a handheld treat. Whether you’re making old-fashioned cherry pie bars or trying new recipes, you’ll love them.

What Makes Cherry Pie Bars Special
Cherry pie bars are special because they balance sweet and tart perfectly. The buttery crust and juicy cherries make a delicious mix. They’re also quick to make with canned cherries.
Key Features and Benefits
These bars are tasty and practical. They’re easy to make and take, perfect for parties. Here’s why they’re great:
- Portable and mess-free
- Can be made ahead and stored
- Versatile – enjoy warm or cold
- Perfect for feeding a crowd
Perfect for Any Occasion
Cherry pie bars are great for any event. They’re loved at family gatherings and formal events. Their classic charm is perfect for holidays, and their ease is great for weeknights. Try these artsy cherry pie bar recipes for a modern twist.
| Occasion | Why Cherry Pie Bars Work |
|---|---|
| Family Dinners | Easy to serve and enjoy |
| Potlucks | Portable and crowd-pleasing |
| Bake Sales | Individual servings sell well |
| Holiday Gatherings | Festive and nostalgic |
Cherry pie bars are a must-have for any dessert. Their mix of flavors and textures will make them your favorite.
Essential Ingredients for Cherry Pie Bars
To make delicious cherry pie bars, you need the right ingredients. Let’s look at the key parts that make these treats so good.
Base Ingredients List
For a great crust, use room temperature butter, fresh eggs, and all-purpose flour. The mix of fat to flour is important. Aim for 1 part fat to 2.5 parts flour. This mix makes the crust flaky and tender, perfect with the cherry filling.
Cherry Filling Options
Choosing the right cherry filling is key. Fresh cherries are best, but canned ones work well too. Wondering about the best cherry for pies? Tart cherries like Montmorency are perfect, with just the right sweetness and tartness.
If you’re using canned filling, you might wonder about Comstock and Wilderness. Comstock is thicker with bigger cherries, while Wilderness is more syrupy.

Glaze Components
A simple glaze can make your cherry pie bars even better. Mix powdered sugar, a bit of milk, and almond extract for a sweet topping. Start with a little and add more as needed to get the right taste.
| Ingredient | Amount | Purpose |
|---|---|---|
| Butter | 1 cup | Crust base |
| Cherry pie filling | 2 21-oz cans | Main filling |
| Almond extract | 1 tsp | Flavor enhancer |
| Eggs | 2 | Binding agent |
Kitchen Tools and Equipment Needed
To make tasty cherry pie bars with shortbread crust, you’ll need some basic tools. A 9″ x 13″ baking pan is key for the right crust-to-filling mix. This size makes 24 bars, perfect for sharing or keeping.
An electric mixer is vital for mixing the shortbread crust. If you don’t have one, a strong wooden spoon and some hard work will work. A wire cooling rack is also a must for cooling the bars right after baking.

Other tools that help include parchment paper for easy cleanup and a chef’s knife for cutting the bars. A rolling pin is useful for spreading the crust mix evenly in the pan.
| Tool | Purpose |
|---|---|
| 9″ x 13″ Baking Pan | Baking the cherry pie bars |
| Electric Mixer | Blending shortbread crust ingredients |
| Wire Cooling Rack | Cooling bars after baking |
| Parchment Paper | Easy removal and cleaning |
| Chef’s Knife | Slicing the bars |
| Rolling Pin | Evenly distributing crust mixture |
Make sure your oven is at 350°F for baking these cherry pie bars. The crust bakes for about 10 minutes. The full bars need 22-25 minutes in the oven.
Step-by-Step Preparation Guide
Are you ready to make delicious cherry pie bars? Let’s get started! This guide will help you through each step, from making the base to adding the final touches.
Making the Perfect Base
First, preheat your oven to 350°F (175°C). In a big bowl, mix 1 cup of unsalted butter with 2 cups of granulated sugar until it’s light and fluffy. This might take 5-7 minutes.
Next, beat in 4 large eggs one at a time. Then, add 1 teaspoon of vanilla extract. Mix in 3 cups of all-purpose flour and 1 teaspoon of salt slowly.
Adding the Cherry Filling
Spread 3 cups of the dough into a greased 13×9-inch baking pan. This makes your base layer. Now, it’s time for the cherry filling!
Spread a 21-ounce can of cherry pie filling evenly over the base. The Pioneer Woman’s recipe suggests using homemade cherry filling for extra flavor.
Creating the Top Layer
Take the remaining dough and drop it by teaspoonfuls over the cherry filling. Don’t worry if it’s not perfect – the dough will spread as it bakes. Unlike a traditional cherry pie, you don’t need to prebake the bottom crust of these bars.
Preparing the Glaze
While the bars are baking, make a simple glaze. Mix powdered sugar with a splash of milk and almond extract. Adjust the consistency as needed. Once the bars are golden brown (about 35-40 minutes), remove from the oven and let cool before drizzling with the glaze.

| Component | Ingredient | Amount |
|---|---|---|
| Base | Unsalted Butter | 1 cup |
| Base | Granulated Sugar | 2 cups |
| Base | Eggs | 4 large |
| Base | Vanilla Extract | 1 teaspoon |
| Base | All-Purpose Flour | 3 cups |
| Filling | Cherry Pie Filling | 1 can (21 ounces) |
Tips for Perfect Texture and Consistency

Making cherry pie bars with cake mix is all about finding the right mix. You want a base that’s sturdy but a filling that’s soft and cake-like. Start by not overmixing the crust dough. Mix it just until it comes together to avoid a tough texture.
Also, make sure your ingredients are at room temperature. This helps them mix better, leading to a smoother batter. For the filling, take your cream cheese out a bit early to avoid lumps.
The baking time is key for the right texture. Bake the oat crust at 350˚F for 20 minutes. Then, add the cherry filling and bake for another 25-30 minutes. This will give you a crust that’s golden and a filling that’s just right.
- Use a deep bowl to prevent splashes when mixing ingredients
- Drain excess liquid from cherry pie filling to avoid a watery consistency
- If using gluten-free flour, maintain a 1:1 ratio with all-purpose flour
- Allow bars to cool completely before cutting for clean slices
By following these tips, you’ll get cherry pie bars with cake mix that are perfect. They’ll be crisp on the outside, tender inside, and full of fruity flavor.
Variations and Substitutions
Cherry dessert bars are fun to make and can be changed to fit different tastes. Let’s look at some cool ways to make your baking better.
Alternative Fruit Fillings
Cherry pie bars are tasty, but you can try other fruits too. For a twist, use apple pie filling to make apple pie bars. Blueberry or peach fillings add a summer vibe. Lemon bars are great for a tangy taste.
Dietary Modifications
There are ways to make these bars for different diets:
- Gluten-free: Use almond flour or gluten-free graham crackers for the crust
- Vegan: Swap dairy for plant-based options
- Low-sugar: Cut down sugar or use sugar substitutes
Seasonal Adaptations
Change your cherry dessert bars with the seasons. Use fruits and flavors that match the time of year:
| Season | Fruit Filling | Flavor Addition |
|---|---|---|
| Spring | Strawberry | Lemon zest |
| Summer | Peach | Vanilla bean |
| Fall | Apple | Cinnamon |
| Winter | Cranberry | Orange zest |
For a rich treat, try cherry cheesecake bars. Mix 16 ounces of cream cheese, 1 cup powdered sugar, and 8 ounces of Cool Whip. Top with 21 ounces of cherry pie filling for a big dessert.
These changes work best if you keep the basic recipe. Whether you stick with cherry or try something new, the most important thing is to have fun and enjoy making these treats.
Storage and Make-Ahead Instructions
Cherry crumble bars and cherry streusel bars get even better with time. The flavors mix well overnight, making the texture perfect. Here’s how to keep your bars fresh and delicious.
Proper Storage Methods
Keep your cherry pie bars at room temperature for up to 3 days. Store them in an airtight container or cover with plastic wrap. For longer storage, refrigerate for up to a week.
Freezing Guidelines
Freeze cherry crumble bars for up to 2 months. Wrap each bar in plastic wrap, then put them in a freezer-safe bag. For best results, freeze without the glaze for up to 3 months.
Reheating Tips
To reheat frozen cherry streusel bars, thaw them overnight in the fridge. Warm them in a 350°F oven for 10-15 minutes. For a quick fix, microwave individual bars for 20-30 seconds.
| Storage Method | Duration | Temperature |
|---|---|---|
| Room Temperature | 3 days | 68-72°F |
| Refrigerated | 1 week | 35-40°F |
| Frozen | 2-3 months | 0°F |
Make-ahead tip: Prepare the cherry filling up to 24 hours in advance and refrigerate. This allows the flavors to meld, making your cherry pie bars taste even better.
Serving Suggestions and Presentation
Cherry pie bars are perfect for any gathering. They’re easy to serve, unlike cherry lattice bars or hand pies. Cut them into squares for a casual dessert or rectangles for a fancy look.
For a fancy touch, drizzle almond-flavored glaze in a crisscross pattern. This adds flavor and makes them look like cherry danishes. Sprinkle sliced almonds on top for crunch and beauty.
Present your bars on a platter or wooden board. For individual servings, place each bar on a dessert plate with whipped cream or ice cream. This mix of warm and cool is delightful.
“Nothing makes me happier than watching someone’s face light up with their first bite.”
Try a cherry pie bar station at your next potluck. Offer toppings like chocolate sauce, caramel, or nuts. This lets guests make their own dessert, making it more fun than traditional turnovers.
Remember, how you present matters. Use a sharp knife dipped in hot water for clean cuts. This trick will make your bars look as good as they taste, impressing everyone.
Troubleshooting Common Issues
Making cherry pie bars can be tricky, but with a few tips, you’ll master this delicious treat. Let’s explore some common problems and their solutions. By the way, did you know cherry pie is often served on President’s Day? It’s a nod to the famous tale of George Washington and the cherry tree.
Texture Problems
If your crust turns out too crumbly, you might need to add more butter. For a tough crust, avoid overworking the dough. Remember, the key is to handle it gently. For perfect texture, chill your dough for at least 2 hours before rolling it out.
Baking Challenges
Uneven baking can be frustrating. To avoid this, rotate your pan halfway through baking. If you’re experiencing over-browning, cover the edges with foil. Start baking at 400°F (204°C) for 20 minutes, then reduce to 375°F (190°C) for the remaining time.
Filling Issues
A runny filling can ruin your bars. To prevent this, cook your cherry filling on low heat for 3-4 minutes to reduce juices. Use 1/4 cup (28g) of cornstarch as a thickener. For the perfect cream cheese filling, ensure all ingredients are at room temperature before mixing.
Remember, patience is key. Allow your baked bars to cool completely, at least 1 hour, before slicing. This ensures clean cuts and a set filling. For faster cooling, you can refrigerate them. With these tips, your cherry pie bars will be a hit at any gathering, presidential or not!
| Issue | Solution |
|---|---|
| Crumbly crust | Add more butter |
| Tough crust | Handle dough gently |
| Uneven baking | Rotate pan halfway through |
| Over-browning | Cover edges with foil |
| Runny filling | Cook filling to reduce juices |
Time-Saving Tips and Shortcuts
Want to make delicious cherry pastry bars fast? We’ve got tips to help you. You’ll have a batch ready in no time.
Start with pre-made components. Canned cherry pie filling saves a lot of time. If you’re really short on time, store-bought pastry dough is a great option. These shortcuts can cut your prep time from 3 hours to just 1 hour.
Batch-making is another smart move. Make multiple batches and freeze the extras. This way, you’ll always have cherry pastry bars ready. Just wrap them tightly – they can last up to 3 months in the freezer!
- Set your oven to 350°F while you prep
- Use room temperature ingredients for better mixing
- Mix dry and wet ingredients separately before combining
- Aim for a baking time of 20-25 minutes
Efficiency is key. Organize your ingredients before starting. This technique, called mise en place, saves minutes. Clean as you go to avoid a mess at the end.
Remember, these cherry pastry bars are easy to make. They need just a 9×13-inch pan and basic ingredients. You can make a treat that serves 12-16 without a fancy pie crust or lattice top!
FAQ
What are cherry pie bars?
Can I use canned cherries for cherry pie bars?
What’s the difference between Comstock and Wilderness cherry pie filling?
What type of cherry is best for pies and pie bars?
Should I prebake the bottom crust of cherry pie bars?
Can I make cherry pie bars with a cake mix?
How do I store cherry pie bars?
Can I freeze cherry pie bars?
How can I make gluten-free cherry pie bars?
Why is cherry pie often served on President’s Day?
Conclusion
Cherry pie bars are a fun twist on the classic cherry pie. They mix old-fashioned flavors with a modern, easy-to-eat format. To make the crust, you need 1 ½ cups of graham cracker crumbs and ½ cup of butter.
The filling is creamy, thanks to 16 oz of cream cheese and 1 cup of sugar. It pairs well with 1 ½ cups of cherry pie filling.
Bake these bars at 325°F for 40-45 minutes. They’re perfect for sharing and storing. You can keep them in the fridge for up to 5 days or freeze them for a month.
Cherry pie bars are great for any occasion. They’re easy to make and always a hit. Try them out and enjoy the baking process!